 Save Pin
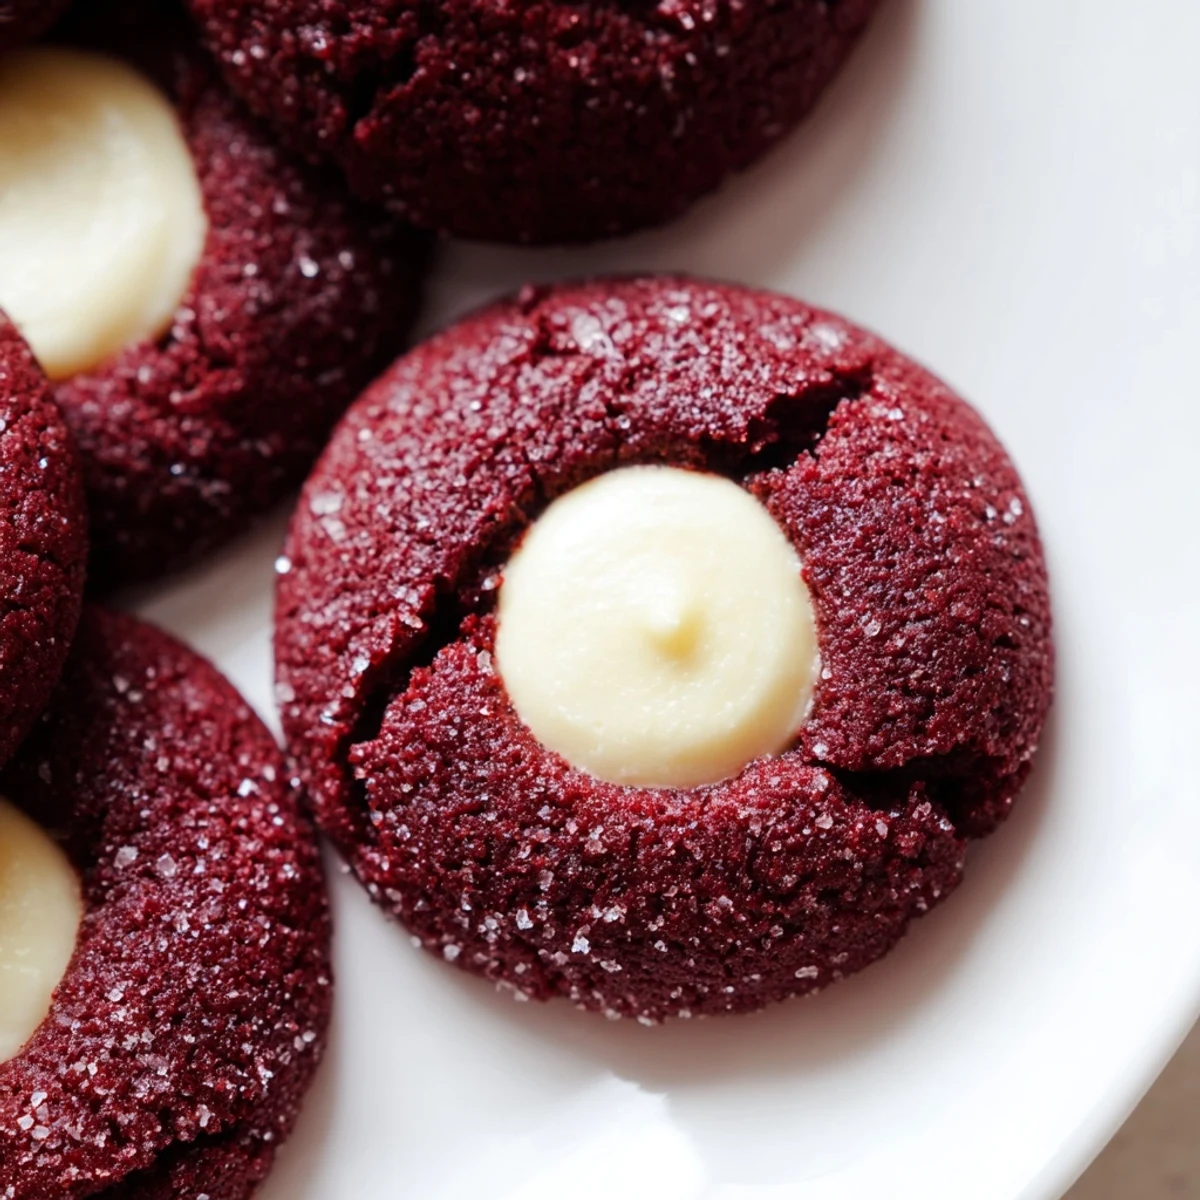
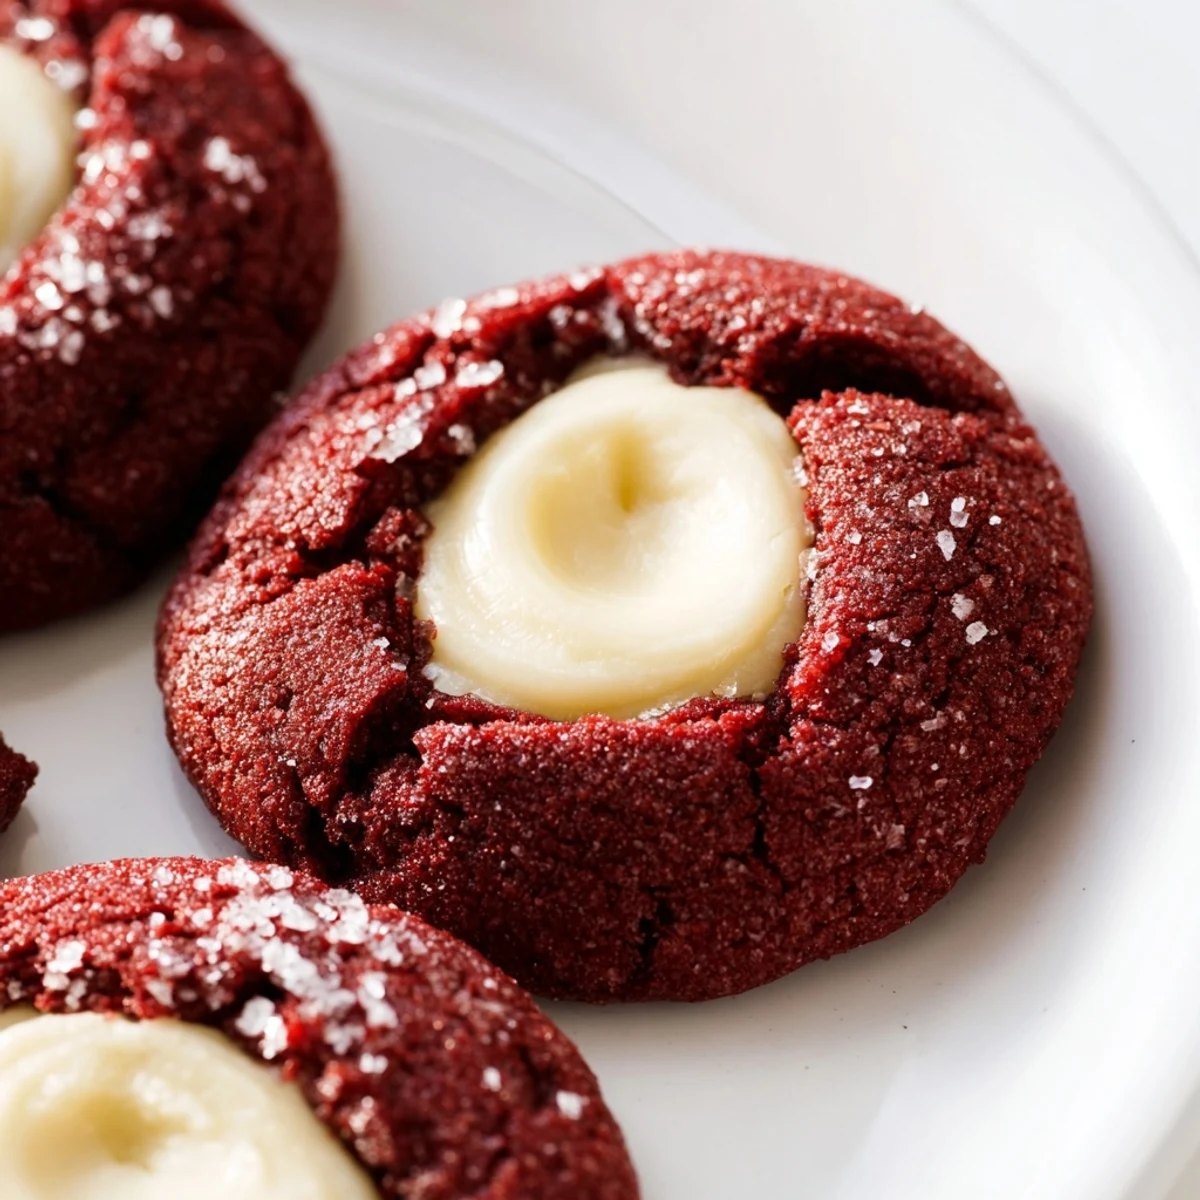
 These classic red velvet thumbprint cookies combine cocoa-infused dough with a tender, melt-in-your-mouth texture. The striking crimson color comes from just the right amount of food coloring, while the cheesecake filling adds a creamy contrast that perfectly balances the chocolate notes.
Simple to prepare and ready in under 35 minutes, these cookies start with a basic buttery dough enriched with cocoa powder. The thumbprint indentation creates the perfect vessel for the sweet cream cheese center. The result is a visually stunning treat that tastes as impressive as it looks.
Perfect for holiday gatherings, Valentine's Day, or anytime you want to add a pop of color to your dessert spread. The 24-cookie yield makes them ideal for sharing.
The first time I made these red velvet thumbprint cookies was actually by accident I had meant to make regular red velvet cookies but got distracted mid-mix and ended up improvising the thumbprint idea. My kitchen smelled like chocolate and excitement, and when they came out of the oven with those gorgeous crimson centers, I knew I'd stumbled onto something special.
Last Christmas Eve, my niece and I made these together while listening to holiday music. She was absolutely fascinated by the red food coloring turning the dough that perfect shade of crimson, and I'll never forget her serious expression explaining to her dad that these were 'fancy cookies with secret middles.' Now they're requested at every family gathering.
Ingredients
- All-purpose flour: The backbone of your cookie dough, providing structure while keeping the crumb tender and perfect for those thumbprint indentations
- Unsweetened cocoa powder: Don't skip this—it gives the red velvet its signature chocolate depth that balances the sweet cream cheese filling
- Baking soda and salt: These work together to give your cookies just the right amount of lift and enhance all the flavors
- Unsalted butter: Use softened butter so it creams properly with the sugar for that perfect texture we want
- Granulated sugar: Sweetens the dough and helps create that slightly crisp edge while keeping centers tender
- Egg yolk: The yolk adds richness and helps bind everything together beautifully
- Whole milk: Just enough moisture to bring the dough together without making it too sticky
- Vanilla extract: Pure vanilla is worth every penny here—it bridges the chocolate and cream cheese flavors
- Red food coloring: Gel coloring works best for that vibrant red without adding extra liquid to your dough
- Cream cheese: Make sure it's properly softened so your filling will be smooth and creamy without any lumps
- Powdered sugar: Sweetens the cream cheese filling while keeping it thick enough to stay in those little wells
Instructions
- Get your oven ready:
- Preheat your oven to 350°F and line two baking sheets with parchment paper so nothing sticks and cleanup is effortless.
- Whisk the dry ingredients:
- In a medium bowl, combine your flour, cocoa powder, baking soda, and salt until everything is evenly distributed.
- Cream the butter and sugar:
- Beat the softened butter and granulated sugar together for about 2 minutes until the mixture looks fluffy and pale, almost like frosting.
- Add the wet ingredients:
- Pour in your egg yolk, milk, vanilla extract, and red food coloring, then beat until the dough turns a stunning uniform red.
- Combine everything:
- Gradually mix in those dry ingredients just until no white streaks remain—overmixing will make your cookies tough, so gentle is key here.
- Make the cream cheese filling:
- In a small bowl, whisk together the softened cream cheese, powdered sugar, and vanilla until completely smooth and set it aside.
- Shape your cookies:
- Roll the dough into 1-inch balls, placing them about 2 inches apart on your prepared baking sheets so they have room to spread.
- Create those thumbprints:
- Use your thumb or the back of a teaspoon to gently press a well into the center of each ball—dont press too deep or the filling might overflow.
- Fill the centers:
- Spoon about half a teaspoon of that creamy filling into each indentation, being careful not to overfill.
- Bake to perfection:
- Pop them in the oven for 11 to 13 minutes until the edges look set and slightly firm but the centers still feel soft.
- Cool completely:
- Let them rest on the baking sheet for 5 minutes before moving them to a wire rack—the filling needs time to set up.
 Save Pin
 These cookies have become my go-to for bringing to gatherings because they travel surprisingly well. Last summer I took them to a picnic and even after a warm car ride, they held their shape and everyone kept asking where I bought them.
Making Them Your Own
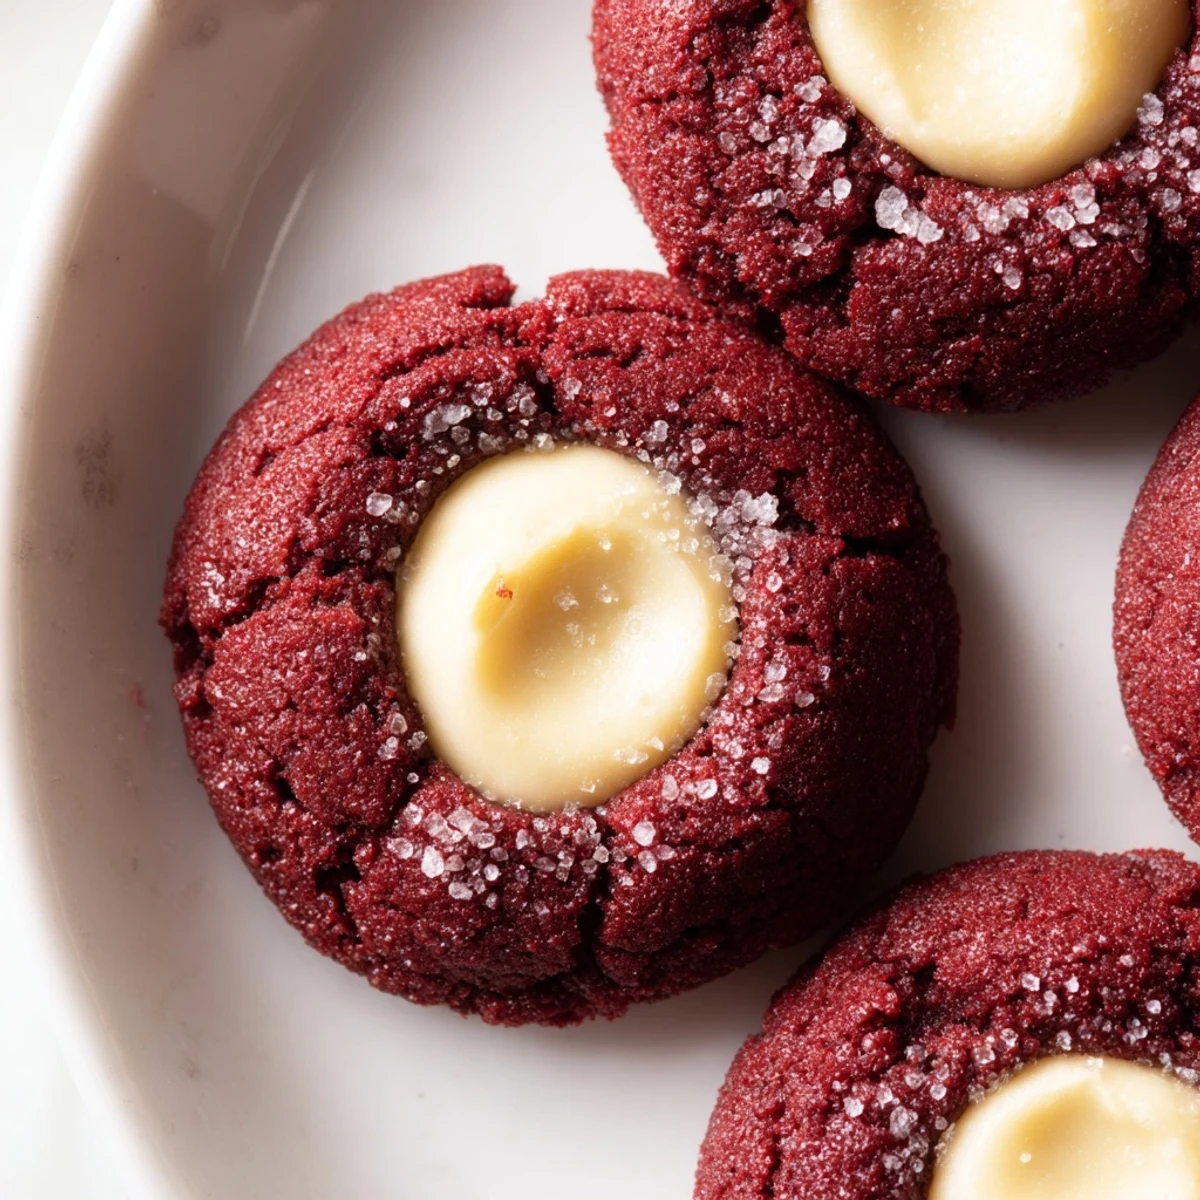
While the cream cheese filling is classic, I've discovered that white chocolate ganache works beautifully too. Simply melt white chocolate with a splash of heavy cream, let it cool slightly, and fill your thumbprints the same way. The richness pairs perfectly with that cocoa-forward cookie base.
Getting That Perfect Red
I've learned that gel food coloring gives you the most vibrant red without changing your dough consistency. Liquid coloring can make your dough sticky and hard to work with, so if you only have liquid, start with a few drops and add more gradually. Remember that the color will deepen slightly as the cookies bake.
Storage and Make-Ahead Tips
These cookies actually taste better after chilling in the refrigerator overnight—the flavors meld together beautifully. Store them in an airtight container with parchment paper between layers, and they'll keep for up to 4 days. The dough also freezes well for up to a month if you want to bake fresh cookies later.
- Let the baked cookies cool completely before refrigerating, or condensation will make them soggy
- If freezing dough balls, flash freeze them on a baking sheet first so they don't stick together
- Bring refrigerated cookies to room temperature for about 15 minutes before serving for the best texture
 Save Pin
 There's something magical about biting into these little jewels—that chocolate cookie giving way to creamy filling never gets old. Hope they become a beloved tradition in your kitchen too.
Recipe FAQs
- → What makes red velvet cookies different from regular chocolate cookies?
-
Red velvet cookies combine cocoa with a subtle tangy flavor and a softer, more tender crumb structure than traditional chocolate cookies. The iconic red color comes from food coloring, while the chemical reaction between the cocoa and acidic ingredients creates that distinct velvety texture.
- → Can I make the dough ahead of time?
-
Absolutely. The dough can be prepared and chilled for up to 2 days before baking. Store it wrapped tightly in plastic wrap or in an airtight container. Let the dough sit at room temperature for about 15 minutes before rolling into balls for easier handling.
- → What other fillings work well with these cookies?
-
Beyond the classic cheesecake filling, try white chocolate ganache, dark chocolate fudge, raspberry jam, lemon curd, or even salted caramel. The cocoa base pairs beautifully with both tart fruit flavors and rich, creamy alternatives.
- → Why did my cookies lose their indentation during baking?
-
This commonly happens when the dough is too warm or the indentation isn't deep enough. Try pressing your thumb down firmly to create a deeper well before baking. You can also use the back of a rounded measuring spoon for a more uniform shape. If needed, gently press centers again immediately after removing from the oven while still warm.
- → How should I store these cookies?
-
Due to the cream cheese filling, store in an airtight container in the refrigerator for up to 4 days. Bring to room temperature for about 15 minutes before serving for the best texture and flavor. These cookies also freeze well—place in a freezer-safe container with parchment paper between layers for up to 2 months.
- → Can I use natural food coloring instead?
-
Yes, beet juice or powder works well as a natural alternative to red food coloring, though you may need slightly more to achieve that vibrant crimson hue. Start with 1 tablespoon beet juice and add more as needed until you reach your desired shade.