 Save Pin
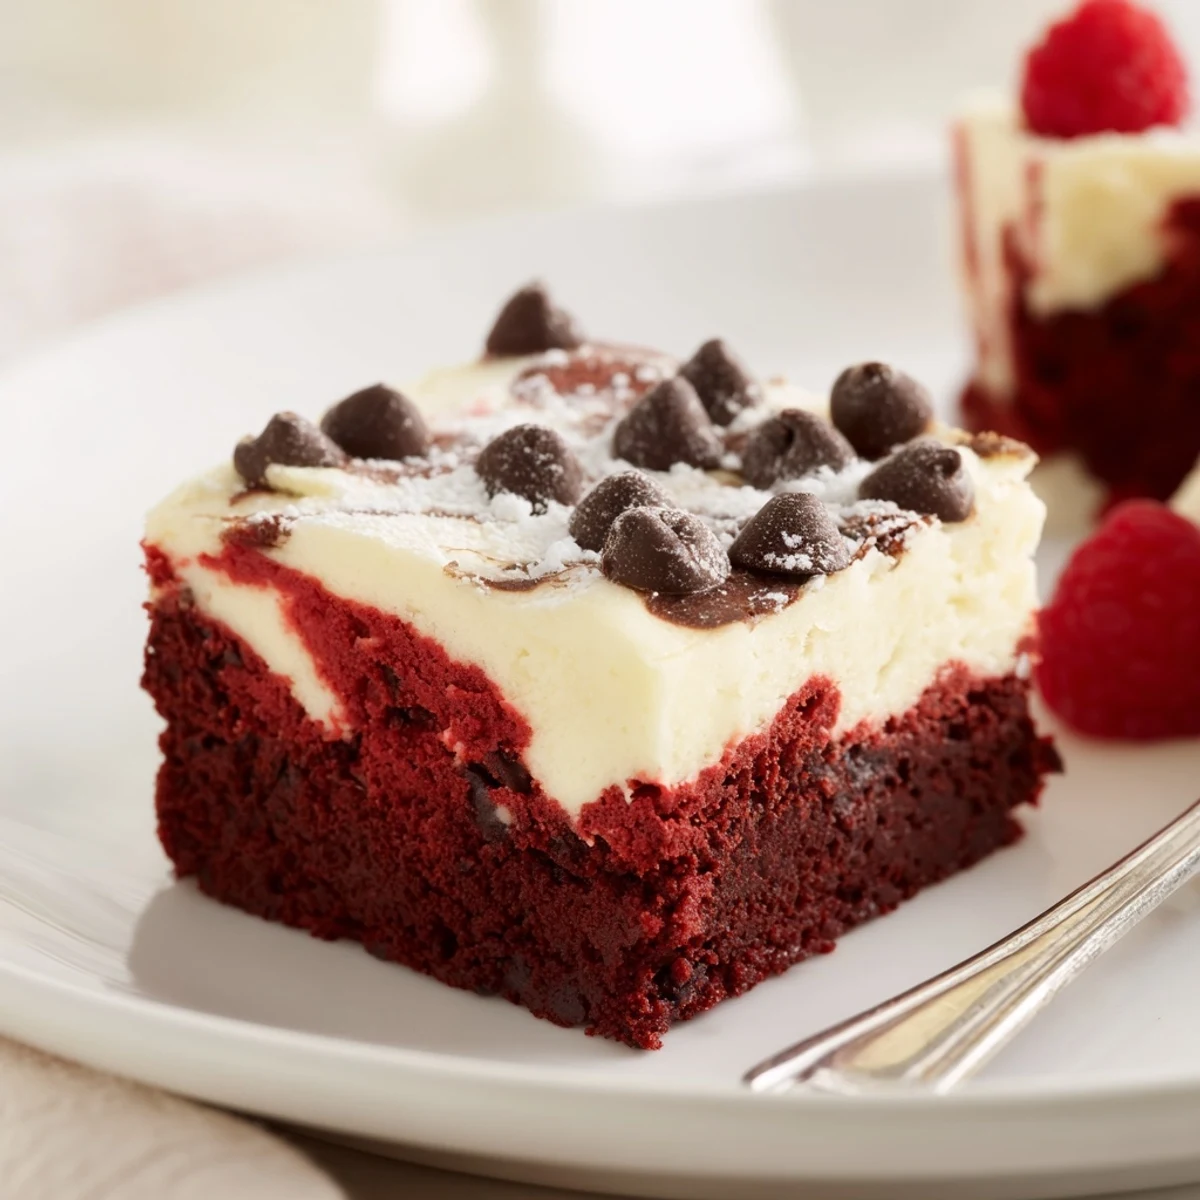
 These red velvet brownies layer a fudgy, cocoa-scented base with a silky, tangy cheesecake topping. Melted butter and sugar are whisked with eggs and red coloring, then flour and cocoa are gently folded in. Most batter is spread in an 8-inch pan, cheesecake filling is smoothed over, reserved batter is dotted and swirled for a marbled top. Bake about 33–37 minutes, cool completely and chill at least 1 hour before cutting. Makes 16 squares.
There is a particular hush in the kitchen whenever I start swirling together cheesecake and brownie batters, a kind of anticipation that feels electric. When I first attempted these red velvet brownies with a cheesecake layer, my apartment filled instantly with that sweet, buttery aroma tinged with a hint of cocoa. I remember glancing at the marbled top through the oven glass, crossing my fingers that the layers would bake up as pretty as they looked going in. The result was a tray of brownies that disappeared before the pan had a chance to cool completely.
Once, I brought a batch of these brownies to a friend's movie night, not mentioning the cheesecake surprise. The collective gasp at the first slice, when creamy swirls emerged in every square, still makes me grin. It’s the sort of dessert that breaks the ice and gets people talking, even before the opening credits.
Ingredients
- Unsalted butter: Melted butter makes the brownie layer chewy and rich—let it cool slightly for a glossy batter.
- Granulated sugar: Both layers use sugar, which keeps everything sweet and helps the cheesecake top bake up with a delicate crackle.
- Large eggs: Add structure to both components and give the brownies their signature fudgy bite.
- Vanilla extract: Deepens the flavors—splurge for pure vanilla if you can.
- Red food coloring: Provides that dramatic red hue—the gel kind offers a deeper color without thinning the batter.
- All-purpose flour: Structure matters; make sure to measure it lightly by spooning and leveling to avoid a dense bottom.
- Unsweetened cocoa powder: Just enough cocoa keeps things chocolaty without overpowering the tang of the cheesecake.
- Salt: Rounds out the sweetness and wakes up the chocolate notes.
- Cream cheese: Room temperature is essential here—cold cream cheese will create lumps that refuse to go away.
Instructions
- Prepare the Pan:
- Line your square pan with parchment, letting it hang over the edges—this trick saves your sanity at serving time.
- Start the Red Velvet Brownie Batter:
- In a medium bowl, whisk melted butter with sugar until glossy and just a shade lighter; this always signals a good base for fudgy texture.
- Add the Wet Ingredients:
- Mix in the eggs, vanilla, and food coloring—the batter should turn a stunning shade of red and feel silky as you stir.
- Fold in Dry Ingredients:
- Carefully sift in the flour, cocoa, and salt, then gently fold until it’s just mixed; resist overdoing it, as it keeps the layer tender.
- Layer the Brownie Base:
- Scoop about three-quarters of your red velvet batter into the pan and spread evenly, feeling how it sticks just a bit to your spatula.
- Make the Cheesecake Layer:
- Beat the cream cheese and sugar together in a separate bowl until completely smooth, then add the egg and vanilla for a creamy, satin-like batter.
- Assemble the Layers:
- Gently pour the cheesecake mixture over the brownie base and smooth with care, followed by dollops of the remaining red velvet on top.
- Create the Swirl:
- Drag a knife or skewer in slow, figure-eight motions—let the layers gently entwine but avoid overmixing or you’ll lose that marbled effect.
- Bake:
- Slide the pan into your preheated oven, catching a whiff of chocolate and sweet cream as it bakes for just over half an hour.
- Cool and Chill:
- Let the brownies cool in the pan before chilling in the fridge—hard as it is to wait, this step gives you those clean, beautiful slices.
 Save Pin
 I recall a quiet Sunday afternoon when my partner and I lingered over plates of these brownies, coffee in hand, contemplating whether to eat just one more. There’s something comforting in sharing a familiar favorite with someone you love, especially when the conversation wanders as easily as the swirls on top.
Swirl Success: Getting the Marble Just Right
Marbling can seem intimidating, but relaxing your grip and trusting your hand yields the prettiest patterns. The first time I tried, I over-swirled and wound up with pinkish muddles, so now I stick to a few slow movements. I often turn the pan gently to inspect my handiwork before baking—there’s something playful about shaping dessert with a skewer.
Serving Ideas to Make Them Pop
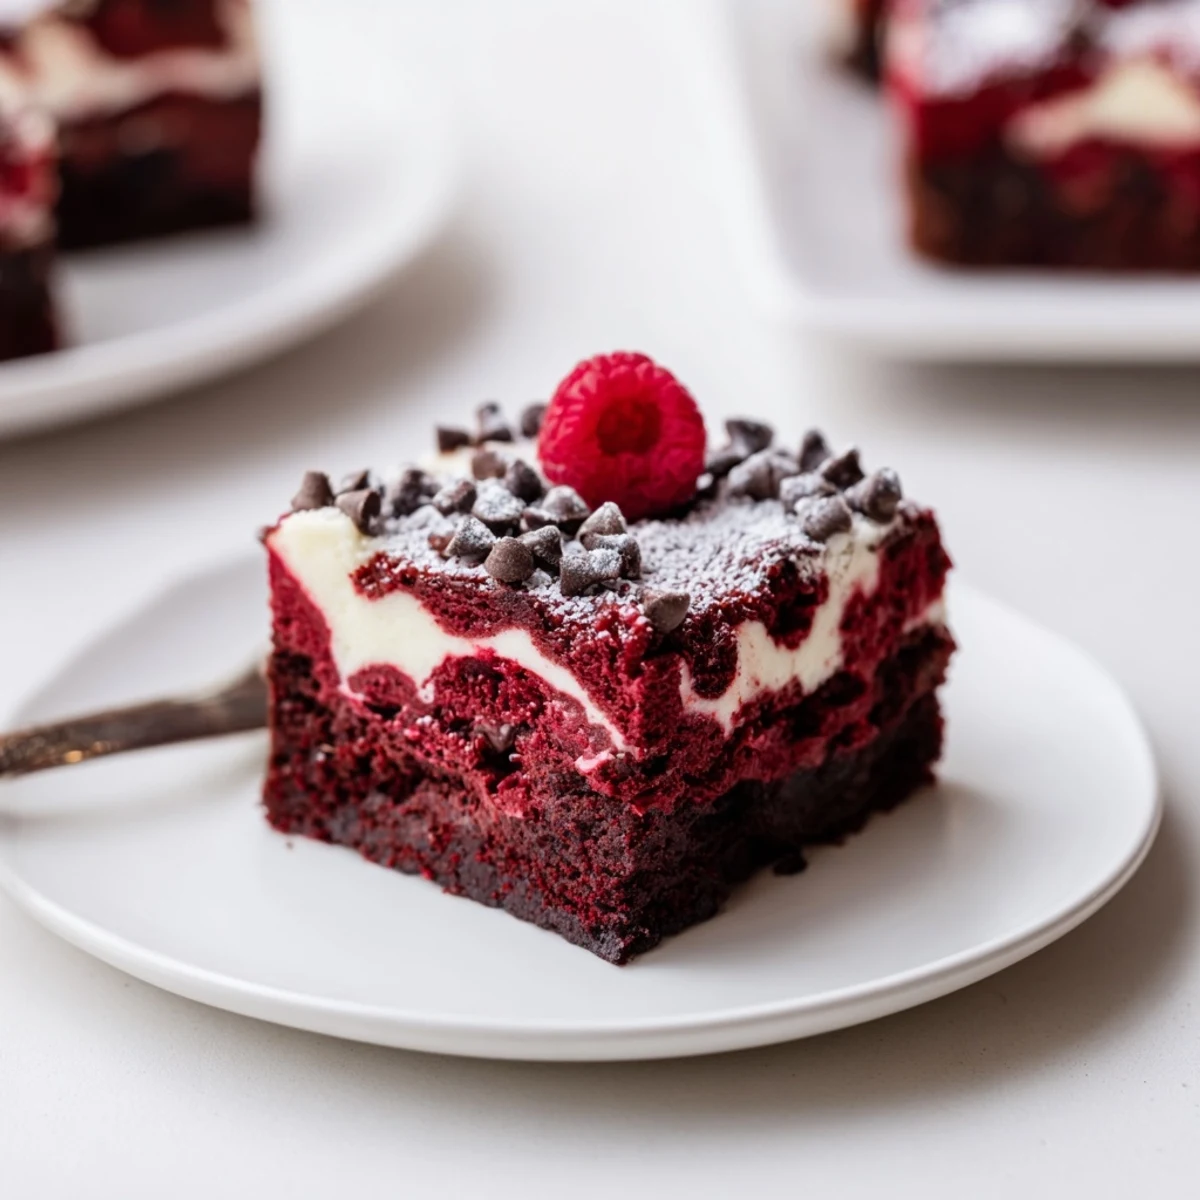
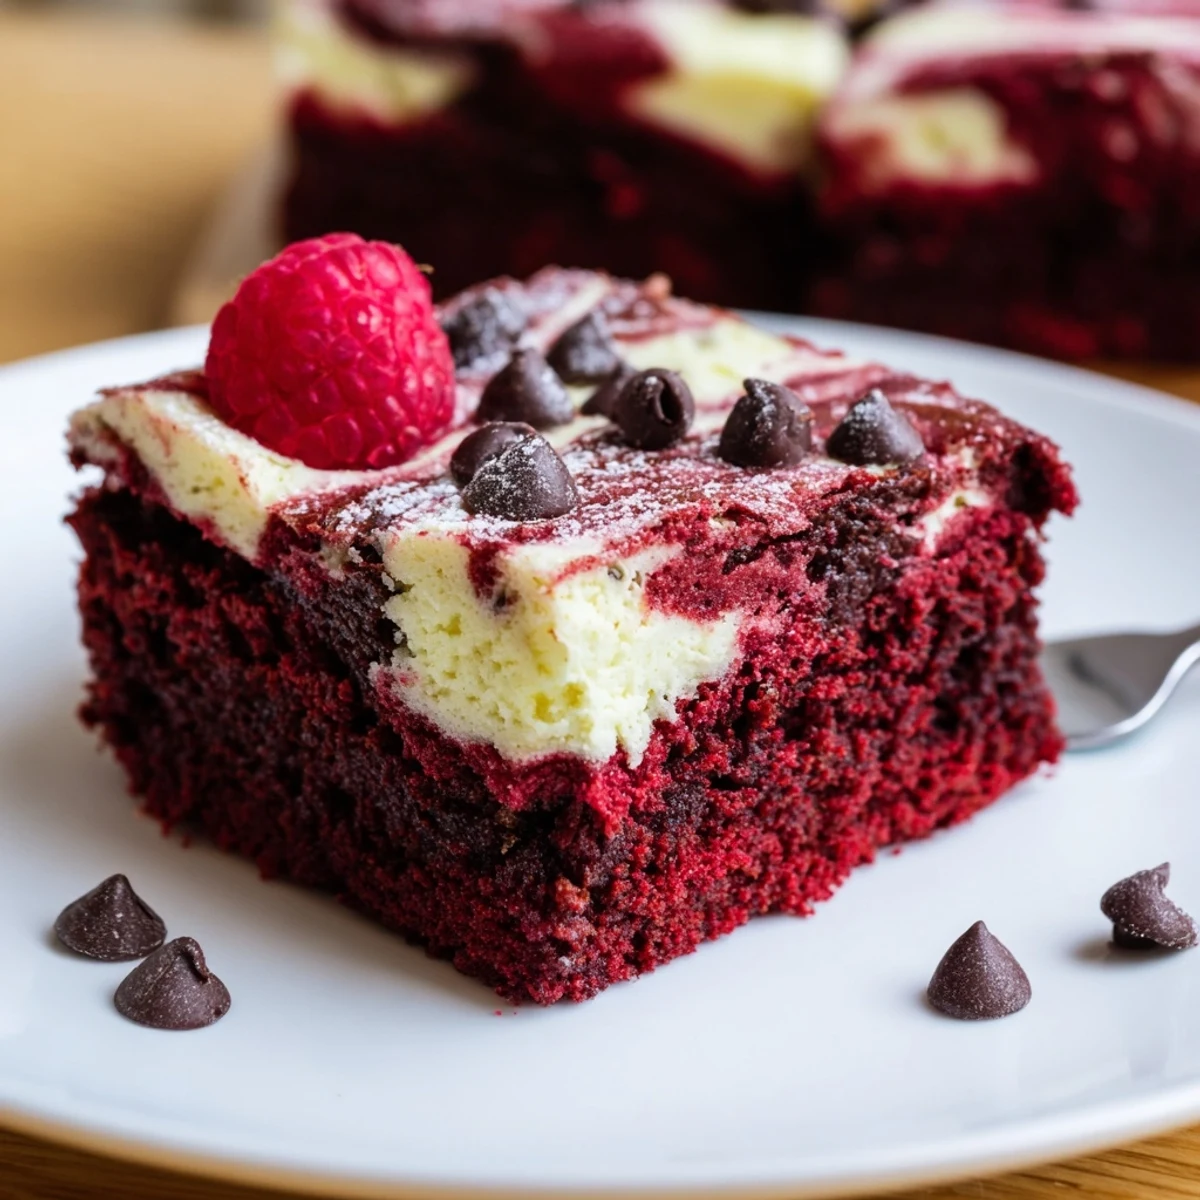
Chilled brownies have a denser bite, while a short rest at room temp brings back a gentle creaminess to the cheesecake swirl. Sometimes I top heaps of slices with fresh raspberries or a dusting of powdered sugar for a bakery-worthy effect. Presentation is never tough with these—every bar shows off the marbled top naturally.
Troubleshooting and Last Touches
Don’t panic if the top gets a few cracks—it only adds to their homemade charm. If your cheesecake layer looks runny, keep beating until it’s thick and spreadable. I always double-check the bake by nudging the pan gently—the center should barely jiggle before coming out of the oven.
- Keep parchment paper edges long for easy lifting later.
- If your red velvet layer feels stiff, warm the bowl between your hands before spreading.
- Remember: flavors deepen once chilled overnight.
 Save Pin
 These brownies are best shared, but don’t be surprised if you find yourself saving a secret square for later. Here’s to glorious swirls and the sweet moments they bring to your table.
Recipe FAQs
- → How do I know when the center is set?
-
The center should hold with a slight jiggle; a toothpick inserted will come out with a few moist crumbs but not wet batter. Overbaking dries the cheesecake layer.
- → Can I use gel food coloring instead of liquid?
-
Yes. Gel coloring gives a deeper hue with less liquid—start with a small amount and add until you reach the desired red intensity.
- → Any tips for achieving a smooth cheesecake layer?
-
Beat cream cheese and sugar until fully smooth before adding the egg; room-temperature cream cheese prevents lumps and ensures an even top.
- → How should I store the bars?
-
Cover and refrigerate for up to 4–5 days. Chill before slicing to get clean edges; bring to room temperature briefly if you prefer a softer bite.
- → Can I add mix-ins like chocolate chips?
-
Yes—sprinkle chips over the brownie layer before pouring the cheesecake mixture. Use mini chips to avoid sinking and maintain an even top.
- → What size pan and yield should I expect?
-
Use an 8-inch (20 x 20 cm) square pan. The batch yields about 16 brownies when cut into small squares.